Out of the Archives: "Last-minute, High-temperature Thanksgiving, or Thank you, Mr. Steingarten" (2007)


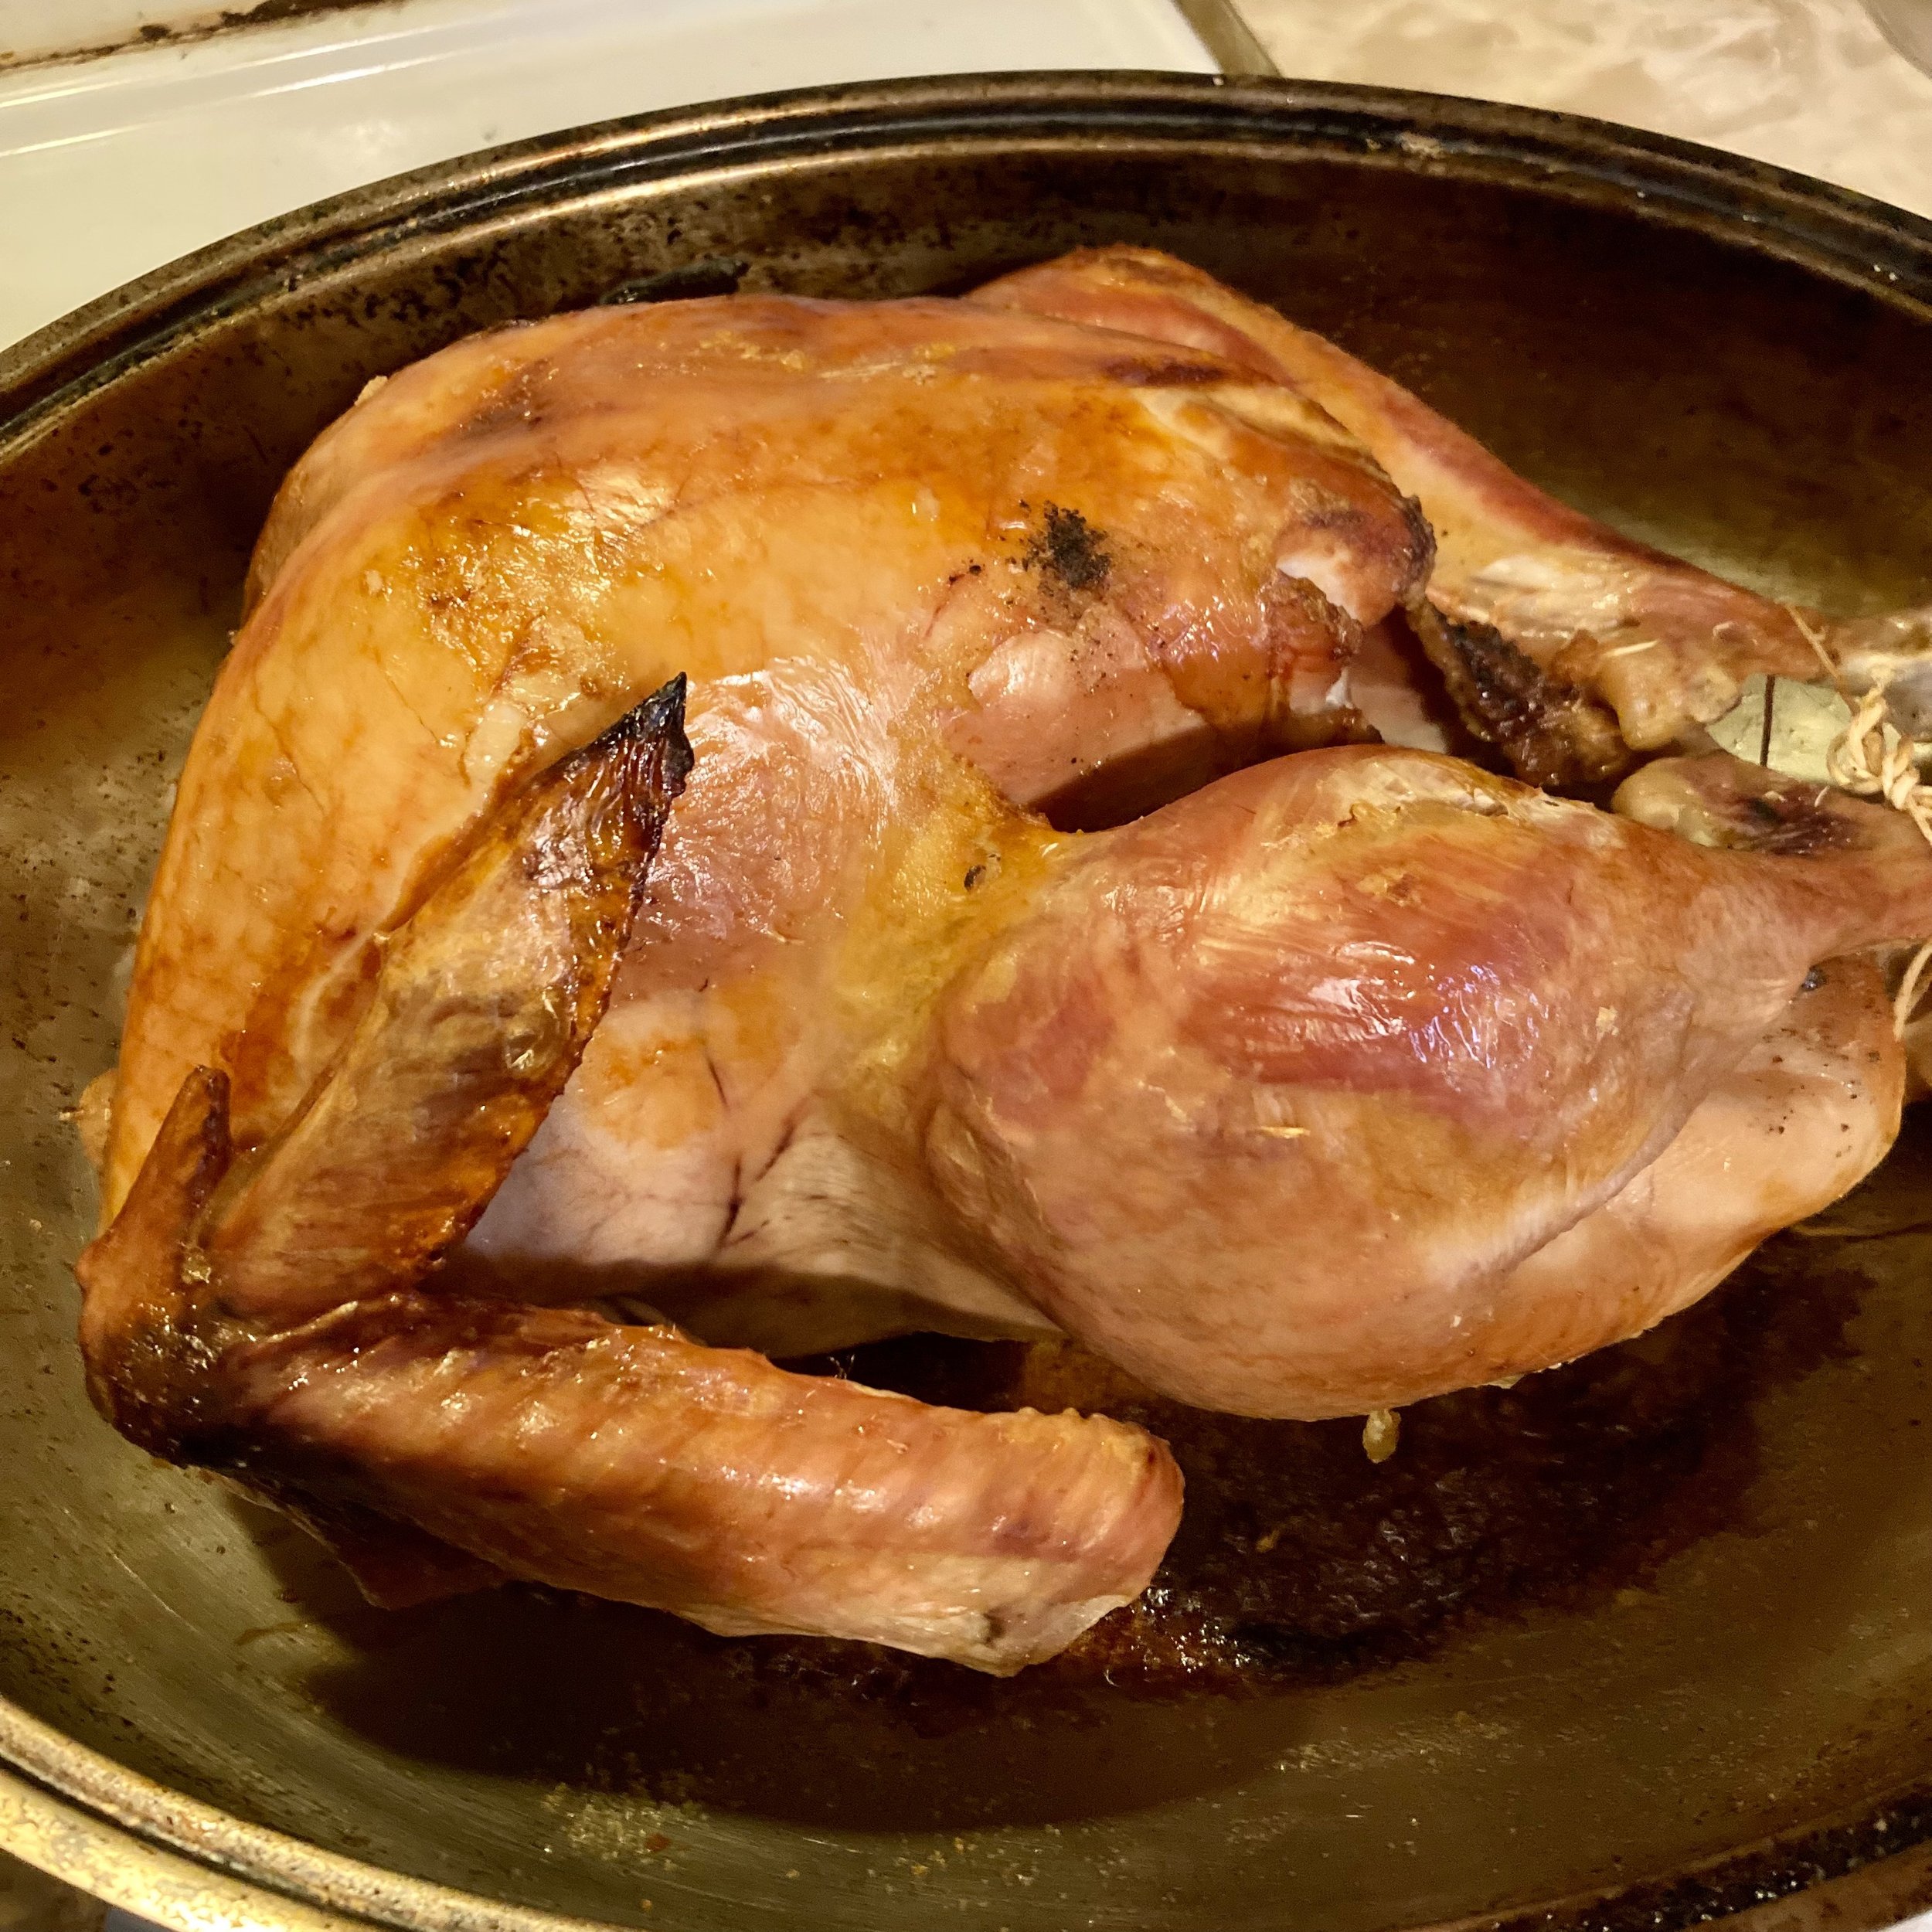
Fig. a: High-Temperature Turkey, 2023 Edition

This post first appeared in November 2007, right before American Thanksgiving, in advance of the annual expats’ Thanksgiving dinner we held in Montreal for years. Jeffrey Steingarten’s High-Temperature Turkey (which he learned from Barbara Kafka) is still the method we turn to virtually every time we roast a turkey. It has never let us down.

Do you love turkey dinners as much as we do? Are you unfamiliar with the fabled High-Temperature Turkey? Read on!

—————

For those about to roast...

You know the nightmare. It goes something like this: It's mid-afternoon on an autumn weekday and for some strange reason you have the day off. You've been going about your happy-go-lucky business, doing all sorts of pleasant autumnal things, and generally enjoying yourself when suddenly you're seized with panic. Your eyes zoom in on your watch and it reads 3:00 PM. You whip your head around to take a look at the calendar that's just materialized on a wall next to you, check today's date, and, sure enough, it reads THANKSGIVING DAY. Only then do you suddenly remember that this year you happened to send out invitations for a Thanksgiving dinner at your place and in a matter of hours 12 hungry people will be turning up on your doorstep fully expecting a big, beautiful roast turkey dinner with all the fixings. You race to your bookshelf and grab a book entitled Cookbook, flip it open to the "Roast Turkey" recipe and, you guessed it, the recipe reads: "Preheat your oven to 325º... Roast your turkey 12-15 minutes per pound..." Not only do you not have the time to roast that 24-lb Butterball, you haven't even bought it yet! You look around you and somehow you've been transported to some barren post-industrial wasteland. You tilt your head back, stare deep into the sky, and yell "NO!!" at top volume. You wake up in a cold sweat.

Okay, maybe your particular version of this nightmare isn't quite as dramatic as this, but you get the point. Well, we're here to tell you that we know the feeling and there's hope.

Flashback a little over a month ago to October 8th, a.k.a. Canadian Thanksgiving 2007. As many of you know, we're big on Thanksgiving here at "...an endless banquet." So much so that we happily celebrate Thanksgiving (at least) twice every year. This year, however, Canadian Thanksgiving caught us a little off-guard. For some reason we hadn't gone through the usual 2-weeks' worth of deliberations concerning menu, ingredients, and approach. In fact, we were caught so off-guard that it was literally 3:00 pm when Michelle decided that we absolutely, positively could not let Canadian Thanksgiving slip by without a traditional feast. She got on the horn, rounded up a few last-minute guests, and then and only then did she get on her bike and head towards the market. By 4:30 pm she was back at home with a lovely 15-pound turkey in tow. By 5:00 pm the turkey was in the oven. And by 7:00 pm the turkey was out of the oven, resting, just minutes from getting carved and served. Our guests arrived, we sat them down and served them drinks, and by 7:30 pm we were digging in to one of the very best turkey dinners in either of our personal histories. Yes, you read that correctly: the turkey was ready in two hours (!) and it was delicious.

No trickery was used, no special tools were required, and, no, we didn't microwave our turkey. We used a regular turkey and a regular oven. We did, however, rely on some high-powered expertise. You see, it was Barbara Kafka's High-Temperature Turkey recipe* as featured in Jeffrey Steingarten's The Man Who Ate Everything, And Other Gastronomic Feats, Disputes, and Pleasurable Pursuits that allowed Michelle and I to be so remarkably cavalier about our Thanksgiving dinner.** The low-down: you get yourself a 12 to 15-lb turkey (any bigger and it'll take up too much room in your oven and get scorched), you crank up your oven to its highest setting (550º), and you never baste it. That's right: you don't baste your turkey either. All you have to do is jiggle every now and again. Sounds insane, we know, but it works. We expected crazy amounts of smoke and frankly we were willing to pay that price in order to have our turkey fully roasted and ready to go in two hours, but somehow our kitchen remained perfectly smoke-free and guest-ready throughout. Nothing short of miraculous.

High-Temperature Turkey

one 15-pound *** turkey at room temperature
salt and pepper
2 onions, halved

Preheat the oven to its highest setting.**** Place the turkey in a large roasting pan, salt and pepper the interior cavity and stuff the onions inside. Place the turkey in the oven and bake for 15 min. Remove the turkey from the oven, and with a wooden spoon or some tongs jiggle the turkey loose from the bottom of the pan. Return the turkey to the oven and repeat this jiggling every 20 min. A 15-pound bird will take just under 2 hours.***** (Ours took 1 hour 50 min.) You want the thigh meat to be between 175 and 180°F. If you have a smaller oven, you may have to cover the bird with a piece of aluminum foil in the late stages of the high-temperature roasting in order to protect it from getting overly blackened, but we didn't. Let the turkey rest at least 10 min. before carving it. The skin will be an amazing auburn colour and it will crackle as you carve it. Inside, the meat will be as juicy as you've ever seen, white and dark alike. Unbelievable. Miraculous even. Plus, you'll find a goodly amount of juices at the bottome of the roasting pan which you can use to make a fittingly phenomenal gravy.

Feeds four ravenous, Thanksgiving-crazed people, and provides them with plenty of mind-blowingly delicious leftovers.


Happy American Thanksgiving!

am/km

* No, Smartypants, this isn't a recipe for giving a turkey a fever.

** Despite its origins, this recipe is the opposite of Kafkaesque. It is as simple and straightforward as they come.

*** Again, turkeys that are any bigger will not work for this method. If you need more turkey, cook two smaller birds.

**** Note that this high temperature will make baking side dishes impossible alongside the turkey. I made the stuffing before, covered it with foil and baked it 30 min. Once the turkey was done, I lowered the oven temperature and returned the stuffing to the oven until it was hot, baking it uncovered for the last few minutes to crisp the top.

***** Here are cooking times for turkeys of other sizes: 9-10 lbs.=1 hour 15 min., 12 lbs.=1 hour 20 min., 20 lbs.=about 3 hrs.

—————

Speaking of miracles. The last time we used the High-Temperature Turkey method was just this past Sunday, for Canadian Thanksgiving 2023. When we’d pulled the turkey out of the oven, and checked its internal temperature (perfect!), we stepped outside onto the balcony of our Montreal apartment, and this is what we saw:

Fig. b: Thank you, Mr. Steingarten!

We took this to be a good omen. We hauled our 12-lb turkey, our deluxe stuffing, and our roasted carrot dish up to our friends’ place in Little Italy and gave thanks.

aj
Late-Summer Bliss, pt. 1


fig. a: late-summer bliss in a bowl

If you live in the Northeast, there’s probably still lots of local corn around. And if you live in the Northeast, and you have access to forests, this is also peak season for chanterelles, especially if you were lucky enough to have a little rain recently.

If you don’t have access to forests, but you do have access to a store that sells fresh, local chanterelles, don’t miss out. Think about it: if you live in the city a) you have to get yourself out to the forest, b) you have to hunt around for the chanterelles yourself, and c) you have to be lucky enough to come across a flush of chanterelles. Unless you have your spots, there’s a lot of chance involved here. Even if you have your spots, who knows, someone might have beaten you to them—it happens. Factor in the price of transportation, and the cost adds up—especially if you come up empty-handed. So if you live in a city like Montreal, and you can easily make your way to Les Jardins Sauvages at Jean-Talon Market to pick up a bunch of pristine, locally harvested chanterelles, don’t balk at the price (do the math!), and don’t miss out. Even enjoying just a handful of chanterelles is a true delicacy, and the season is ever-so-fleeting.

BUT if you have access to the right kind of forest land (say, the Green Mountains of Vermont), and the conditions are right, there’s nothing better than taking a little ramble in the woods. Even if you get stymied when it comes to finding choice, edible mushrooms, you’ll probably see all kinds of other mushrooms, and who knows what else you’ll encounter.

On one such walk, in early August, we came across butterflies,

figs. b & c: unidentified flying creatures

salamanders,

fig. d: commander salamander

two deer (sorry, no photographic evidence—they were too quick for me!), and lots and lots inedible, but rather fantastic mushrooms, including a Witch’s Hat.

figs. e, f, & g: weird and wonderful mushrooms

fig. h: Witch’s Hat!!

And we also found a nice haul of chanterelles, including a somewhat rare white chanterelle.

fig. I: yellow and white gold

fig. j: golden beauties

When we got home, we felt totally rejuvenated.

We also had some very nice souvenirs.

fig. k: nice haul, pt. 1

So, that’s the best-case scenario: a wonderful walk + a successful mushroom-hunting expedition, one where you find a nice quantity of choice, edible mushrooms, like chanterelles.

But, like I said, don’t get hung up on having an optimum mushroom foraging experience, especially if you’re new to the game. It takes a while to know what you’re looking for, and to know where to look for what you’re looking for.

Luckily, Michelle has gotten pretty good at mushroom hunting, so when she led A-Train and I into the woods a couple of weeks ago after there’d finally been some blessed rain, we were feeling pretty confident.

And, sure enough, we soon came across our first flush.

fig. l: first flush

This cluster was fairly small, but they were in very good condition. Within a half an hour, we’d found several other flushes. We were short on time that day, so we had to stick to a schedule, but we were feeling pretty satisfied as we headed back home with our bag of goodies.

fig. m: mushroom hunters

When we laid them out, cleaned them, and took a better look at them, we were even more satisfied.

fig. n: nice haul, pt. 2

The next night, back in Montreal, we made a simple pasta dish with the chanterelles:

egg pappardelle

chanterelles sautéed in butter

fresh minced parsley and chives

crème fraîche

freshly ground black pepper

And a few nights later, still in Montreal, and with my taste for chanterelles still not fully satisfied, we made our way up to Jean-Talon Market to get the ingredients you see in the corn chowder with chanterelles pictured up top. In other words, forage your own chanterelles if you can, but don’t be too proud to turn to the experts if you have to (or if you want to).

Corn Chowder with Chanties

12 ears of corn, shucked and shaved into a large mixing bowl, making sure to collect as much juice from the cob as possible before discarding it (use the back of your knife pressed firmly against the cob to release these juices)

1 sweet onion, diced

2 stalks celery, diced

2 medium carrots, diced

6 small potatoes (preferably new)

2 mild or medium-hot peppers, diced

2 cloves of garlic, minced

chanterelles sautéed in butter (or olive oil) and seasoned with salt

fried bacon or kielbasa (sliced and diced) [optional]

1 dollop of crème fraîche mixed into each bowl just before serving (use 1 tsp - 1 tbsp, depending on the size of your bowls) [optional]

salt & pepper

The method for this chowder is very simple. Sauté your onion in 1 - 2 tbsp of olive oil over medium heat in a large pot until translucent. Add the celery, carrots potatoes,, and peppers and sauté for 5 minutes, until the celery has softened slightly. Add the garlic and sauté for another 1-2 minutes. Add the corn niblets and all the collected corn juice to the pot. Sauté over medium heat for 5-10 to see how much juice the corn releases. Add just enough water to get the mixture to chowder consistency (i.e., not too thin, thick with ingredients). Bring to a boil and then simmer over low heat (adjusting the seasoning first with salt and pepper) until the carrots and (especially) the potatoes are tender, about 45 minutes to one hour. When the veggies are cooked, take the pot off the heat and let it sit for an hour or two to let the flavours meld, or continue on to next steps.

While the soup is simmering, sauté the chanterelles and season them. This should only take a few minutes.

If using bacon or kielbasa, go ahead and fry it. If you’re using both the bacon/kielbasa and the chanterelles, feel free to fry the meat first, and then sauté the chanterelles in the drippings (with maybe just a little butter or olive oil added).

Ladle the hot chowder into bowls. Stir in a dollop of crème fraîche to each bowl. Top each bowl with chanterelles and bacon/kielbasa, if using. Grind some black pepper over each bowl.

Serve with crusty bread and a green salad.

A dry Riesling wouldn’t be the worst idea either.

Enjoy.

There you have it. Late-summer bliss in a bowl.

The corn chowder alone is simply wonderful. Add the chanties, let them sing, and the chowder gets taken to the astral plane.


aj

It's a Disgrace

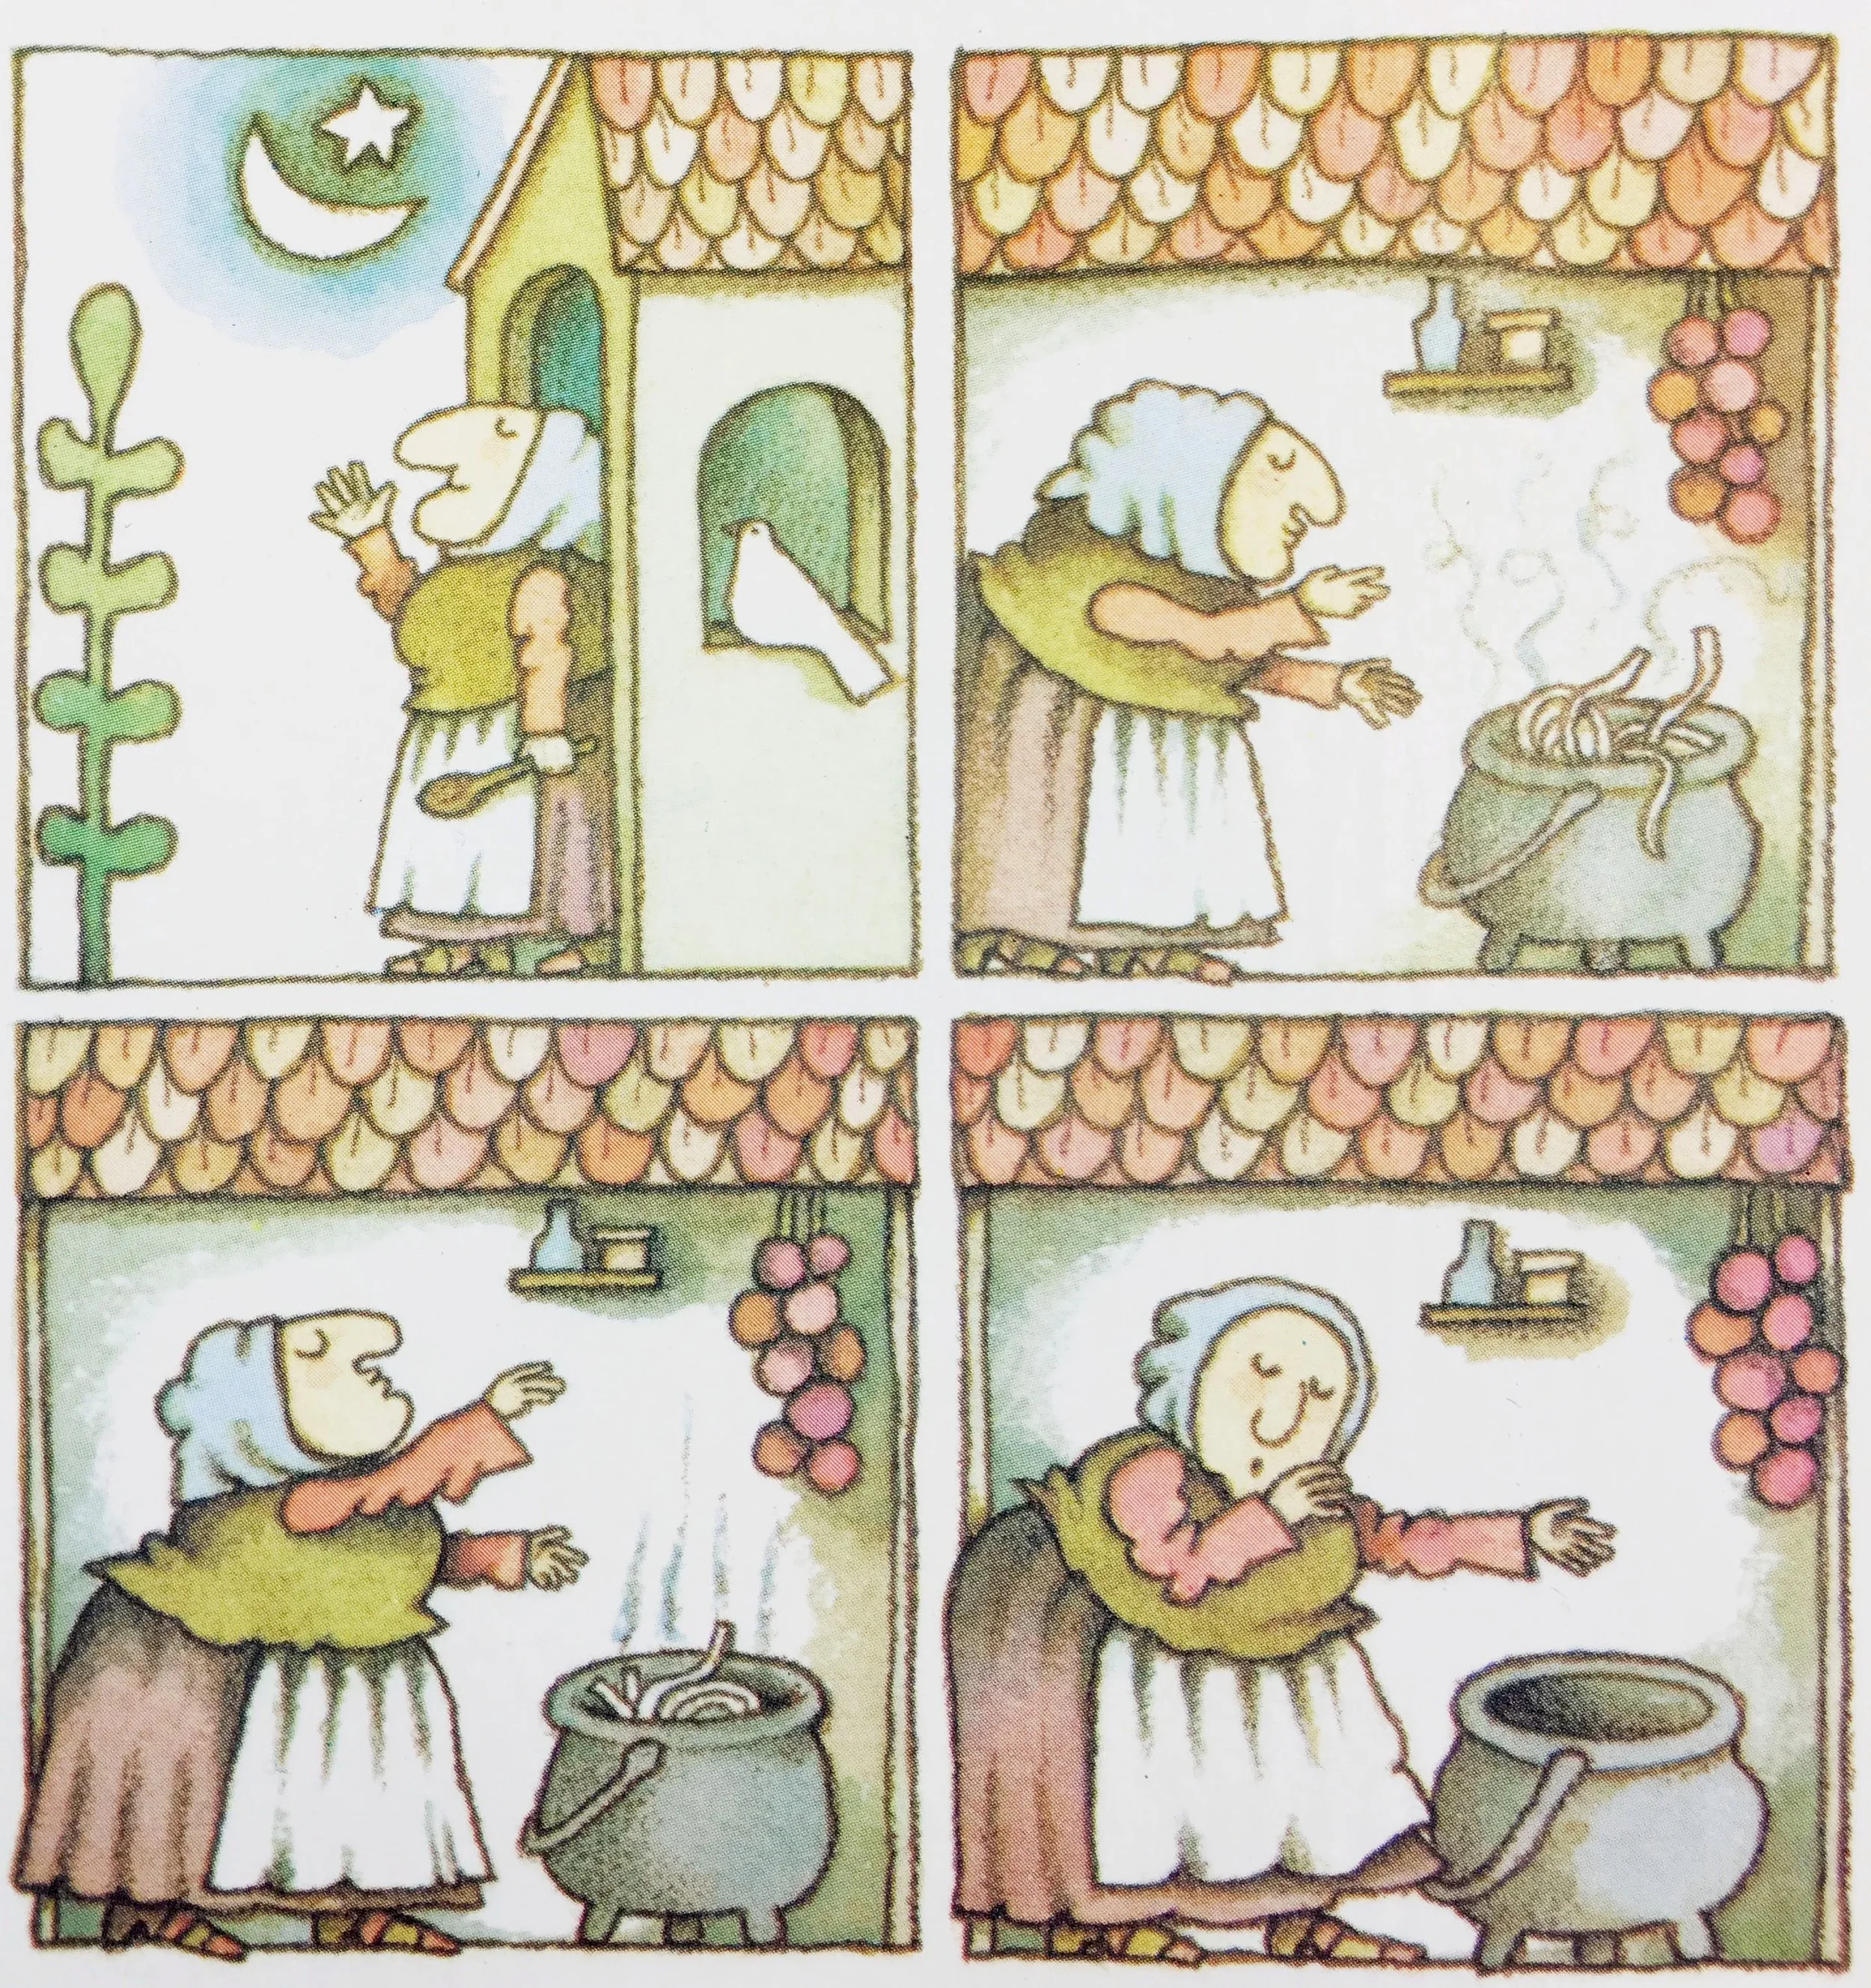
When we were kids, my sister and I were fans of Tomie dePaola’s Strega Nona. Who wasn’t back then? Back in the freewheelin’ '70s. Back before the conservative movement had launched its Inquisition to purge children’s literature of anything that might not be in step with its radical Christian fundamentalism. Back before even Strega Nona came under scrutiny. The book had just won a Caldecott Medal and had quickly become a beloved classic of children’s libraries across America. Of course, I had extra reason to be on board—Strega Nona’s assistant was a guy who went by the name of Big Anthony. Cool handle, right?

fig. a: Nona & Tony

Anyway, recently I found myself thinking about good ole Strega Nona and her witchy ways again for the first time in ages when I came across a tantalizing, revelatory recipe. Why Strega Nona?

fig. b: Nona knows best

Well, it had something to do with the fact that it was a pasta dish that came with a “colourful” Southern Italian name, not unlike Strega Nona (basically “Grandma Witch”). Plus, you don’t need spells or a magic pasta pot to make it, but the dish is rather magical.

The recipe in question was for Rigatoni alla Disgraziata—”the poor wretch’s rigatoni.” (You’ll notice that, as they always are, this pasta dish is gendered feminine, so the “poor wretch” in question is a woman. That didn’t stop me from identifying with her. I mean, Big Anthony didn’t have any hesitations about hanging out with Strega Nona, did he?) The dish is a classic of the Sicilian repertoire, but I’d be surprised if variations aren’t also found in other parts of Southern Italy (like Calabria, Strega Nona’s home region), because it’s basically a simple, honest, and satisfying eggplant pasta dish, a “peasant’s dish,” a prime example of cucina povera. This particular version involves some cheese, but the breadcrumbs that are essential to its preparation would often be used as a substitute for cheese in poorer households. The two vegetables necessary to make the dish are eggplant and tomatoes, staples that virtually every Sicilian family would have had on hand (or would have easily been able to access, one way or another).

fig. c: eggplant & tomatoes

Use the best eggplants and tomatoes you can find—preferably out of your own garden—but the bottom line is this is cucina povera—the cuisine of the poor and of the frugal—use what you have. In my case, I found some gorgeous organic eggplant at the market, but I wasn’t so lucky with tomatoes, so I made do with canned ones.

And while the recipe that I used as a model was for rigatoni, I substituted in busiata instead, because that’s what I had on hand, because they hail from Sicily (Trapani and environs in Western Siciliy, to be specific, where they’re often used to make Busiate alla Trapanese), and because their worm-like shape seemed appropriate to the dish in question (and ideal for the lead-up to Hallowe’en).

figs. d & e: Busiata di Sicilia

My source was a beaten-up old copy of Saveur Cooks Authentic Italian (2001), from the heyday of the beloved magazine. It’s amazing what turns up again when you move, as I did recently, and it’s amazing how well a good cookbook (just like a good children’s book) stands the test of time. Now that my knowledge of Italian cuisine has expanded, now that I’ve spent a little bit more time in Italy, this collection of recipes seems even more vital than it did in the early 2000s. Its cucina povera game was always strong, however, something which was a distinct bonus back when I was a graduate student and which always endeared me to it. Why I’d never tried making Rigatoni alla Disgraziata is a mystery to me.

The technique that’s featured here and that I found “revelatory” is a simple one for preparing eggplant. Eggplant is famously difficult for so many home cooks who don’t come from a tradition of preparing, consuming, and enjoying eggplant. Sure, you’ve read that certain eggplant dishes are considered the pinnacle of vegetable cookery throughout the the Mediterranean region and beyond, but the issue of even choosing nice eggplants can be daunting for many, let alone transforming them into something majestic. And god knows improperly cooked eggplant is a horror.

In this case, I started with Japanese-style eggplants, which are often a safer bet than larger globe eggplants because they’re less seedy and they cook up quicker. The fact that these were local and organic and that I had great faith in the farm that raised them made them an even better bet.

Cubing the eggplants, generously salting and tossing the cubes in a colander, and allowing them to “sweat” for an hour or so is a standard method for removing the bitterness of untreated eggplant. Many recipes that involve Japanese eggplant don’t call for this step, but you still may want to go this route just to be sure (I did).

But the genius of the recipe has to do with pan-frying the eggplant in a generous amount of olive oil before it gets anywhere near a sauce. The idea is to transform the cubes into golden little jewels of flavour that are lightly crispy on the outside and positively melty inside. By the time this step is completed, the eggplant is already delicious, but it’s ready to become even more so when tossed with your sauce, your pasta, and your cheese.

This technique is useful in a wide range of contexts and recipes. For instance, Michelle has been using a variation on this technique (she chops the eggplants differently and cooks them in a different type of oil) for some of her Japanese dishes for years. Like I said, once you’ve prepared the eggplant in this manner and seasoned them, they’re already delicious, anything else you do to them is extra.

But in this case, the eggplant formed the basis of a rustic pasta dish:

Busiate alla Disgraziata

3-5 small Japanese eggplants, or 2 medium globe eggplants, trimmed and cut into cubes

Kosher salt

1/2 cup plus 2 tbsp extra-virgin olive oil

1 cup fresh bread crumbs

1 lb busiata or rigatoni

1/4 tsp red pepper flakes

2 cups tomato sauce, preferably homemade

1/4 cup grated pecorino or ricotta salata

freshly grated Pamegiano-Reggiano

Put the eggplant in a colander, sprinkle liberally with salt, and toss to coat well. Allow to drain for 1 hour to “sweat” and extract bitterness. Rinse the eggplant and pat dry with a clean kitchen towel or paper towel.

Heat 2 tbsp of olive oil in a large, heavy skillet (I used a 10” cast-iron one) over medium-high heat. Add bread crumbs and cook, stirring, until golden, about 2-3 minutes. Transfer to a bowl and set aside.

Wipe out the skillet with paper towel, add remaining 1/2 cup* olive oil, and re-heat over medium-high heat. Add half the eggplant and cook, stirring and flipping the cubes often, until golden, 8-10 minutes. Transfer eggplant with a slotted spoon to a large bowl and season to taste with salt. Repeat process with remaining eggplant.

Cook past in a large pot of boiling generously salted water until al dente. Add red pepper flakes to tomato sauce in a small pot and warm over medium heat, 4-5 minutes. Drain pasta in a colander and add to bowl with eggplant. Add tomato sauce, pecorino or ricotta salata, and bread crumbs and toss well.

Serve sprinkled with Parmigiano Reggiano, accompanied with a glass of red wine, some chili oil, and a green salad.

[Based very closely on a recipe from Saveur Cooks Authentic Italian (2001), by the Editors of Saveur Magazine]

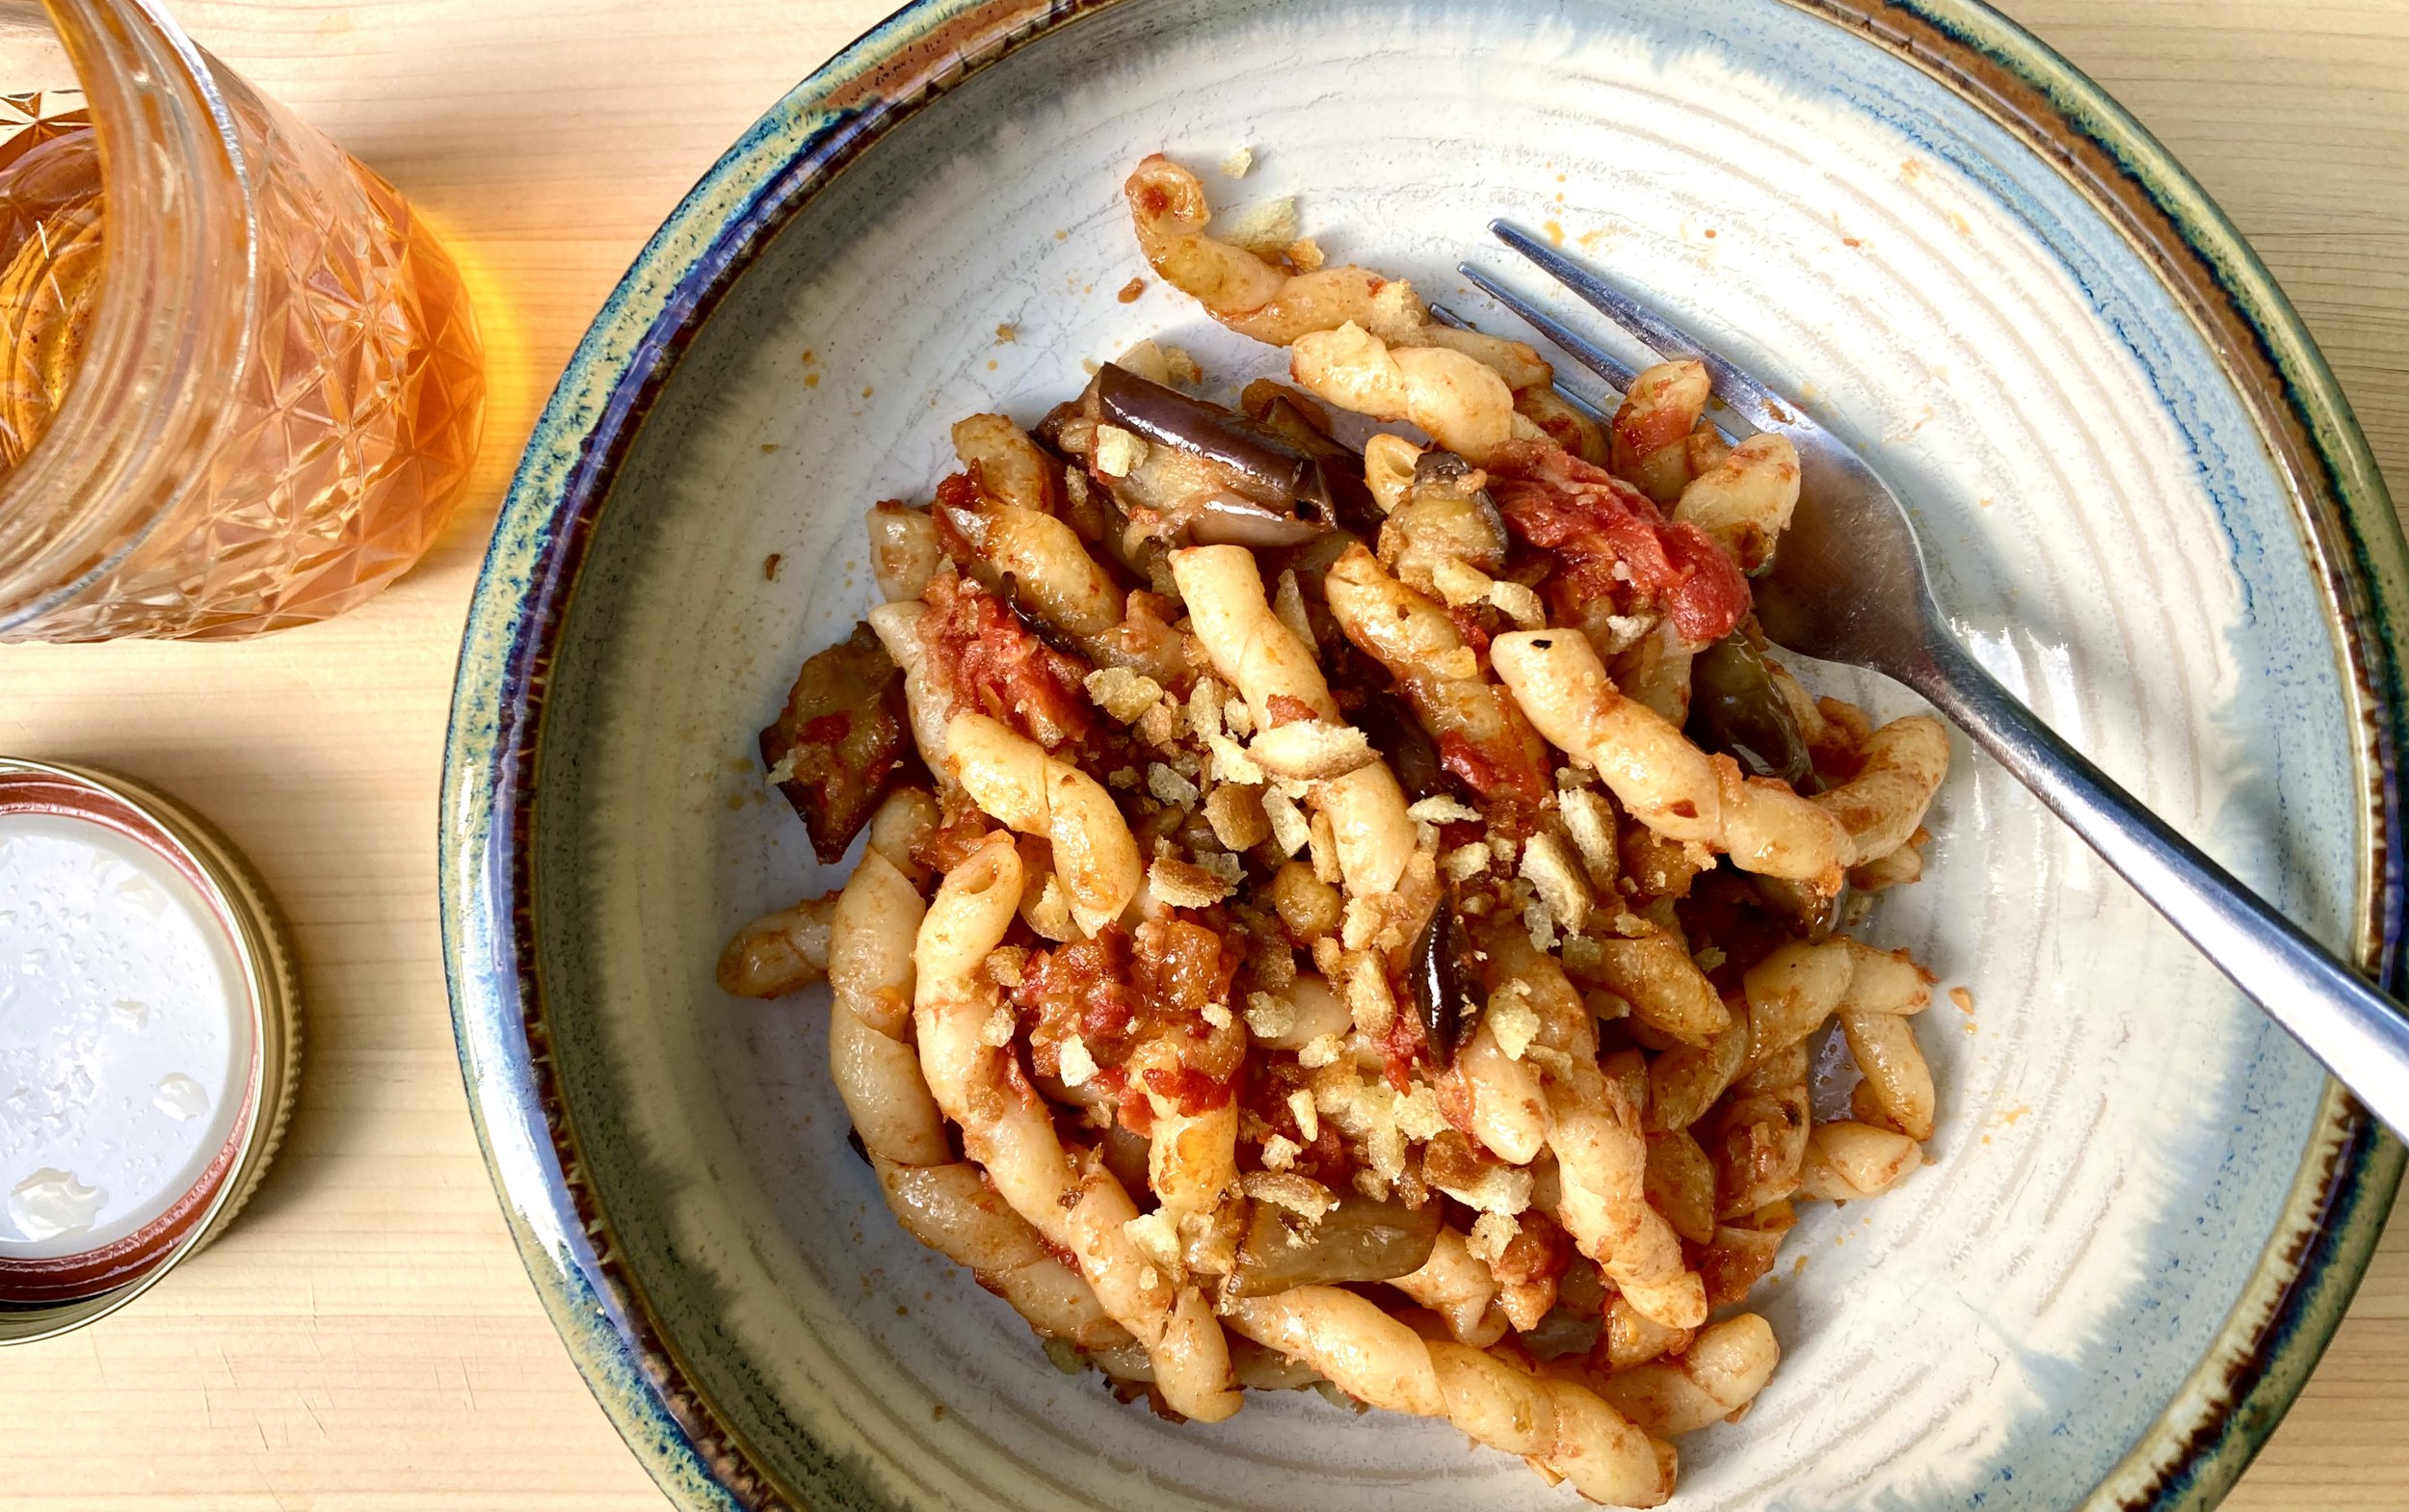
The final product should look something like this:

fig. f: Busiate alla Disgraziata

I found it deeply satisfying, perfect for the late harvest season, and not a disgrace in the least. Quite the contrary. To me it’s quite beautiful, and I wish I had a magic pasta pot that was capable of producing vast quantities of this utterly delicious dish. But even more important is the magical transformation that is at the heart of this recipe, and that blesses it with heart. Like all great cucina povera—like all great “peasant food,” in general—it’s a dish that glories in creating “something” out of “nothing”—something wonderful.

Big Anthony

  • Note: the original recipe calls for 1 cup of olive oil. If you’re using an even larger skillet, you may need to use more olive oil than I did—up to 1 cup. But for a 10” skillet, I found 1/2 cup was ideal.

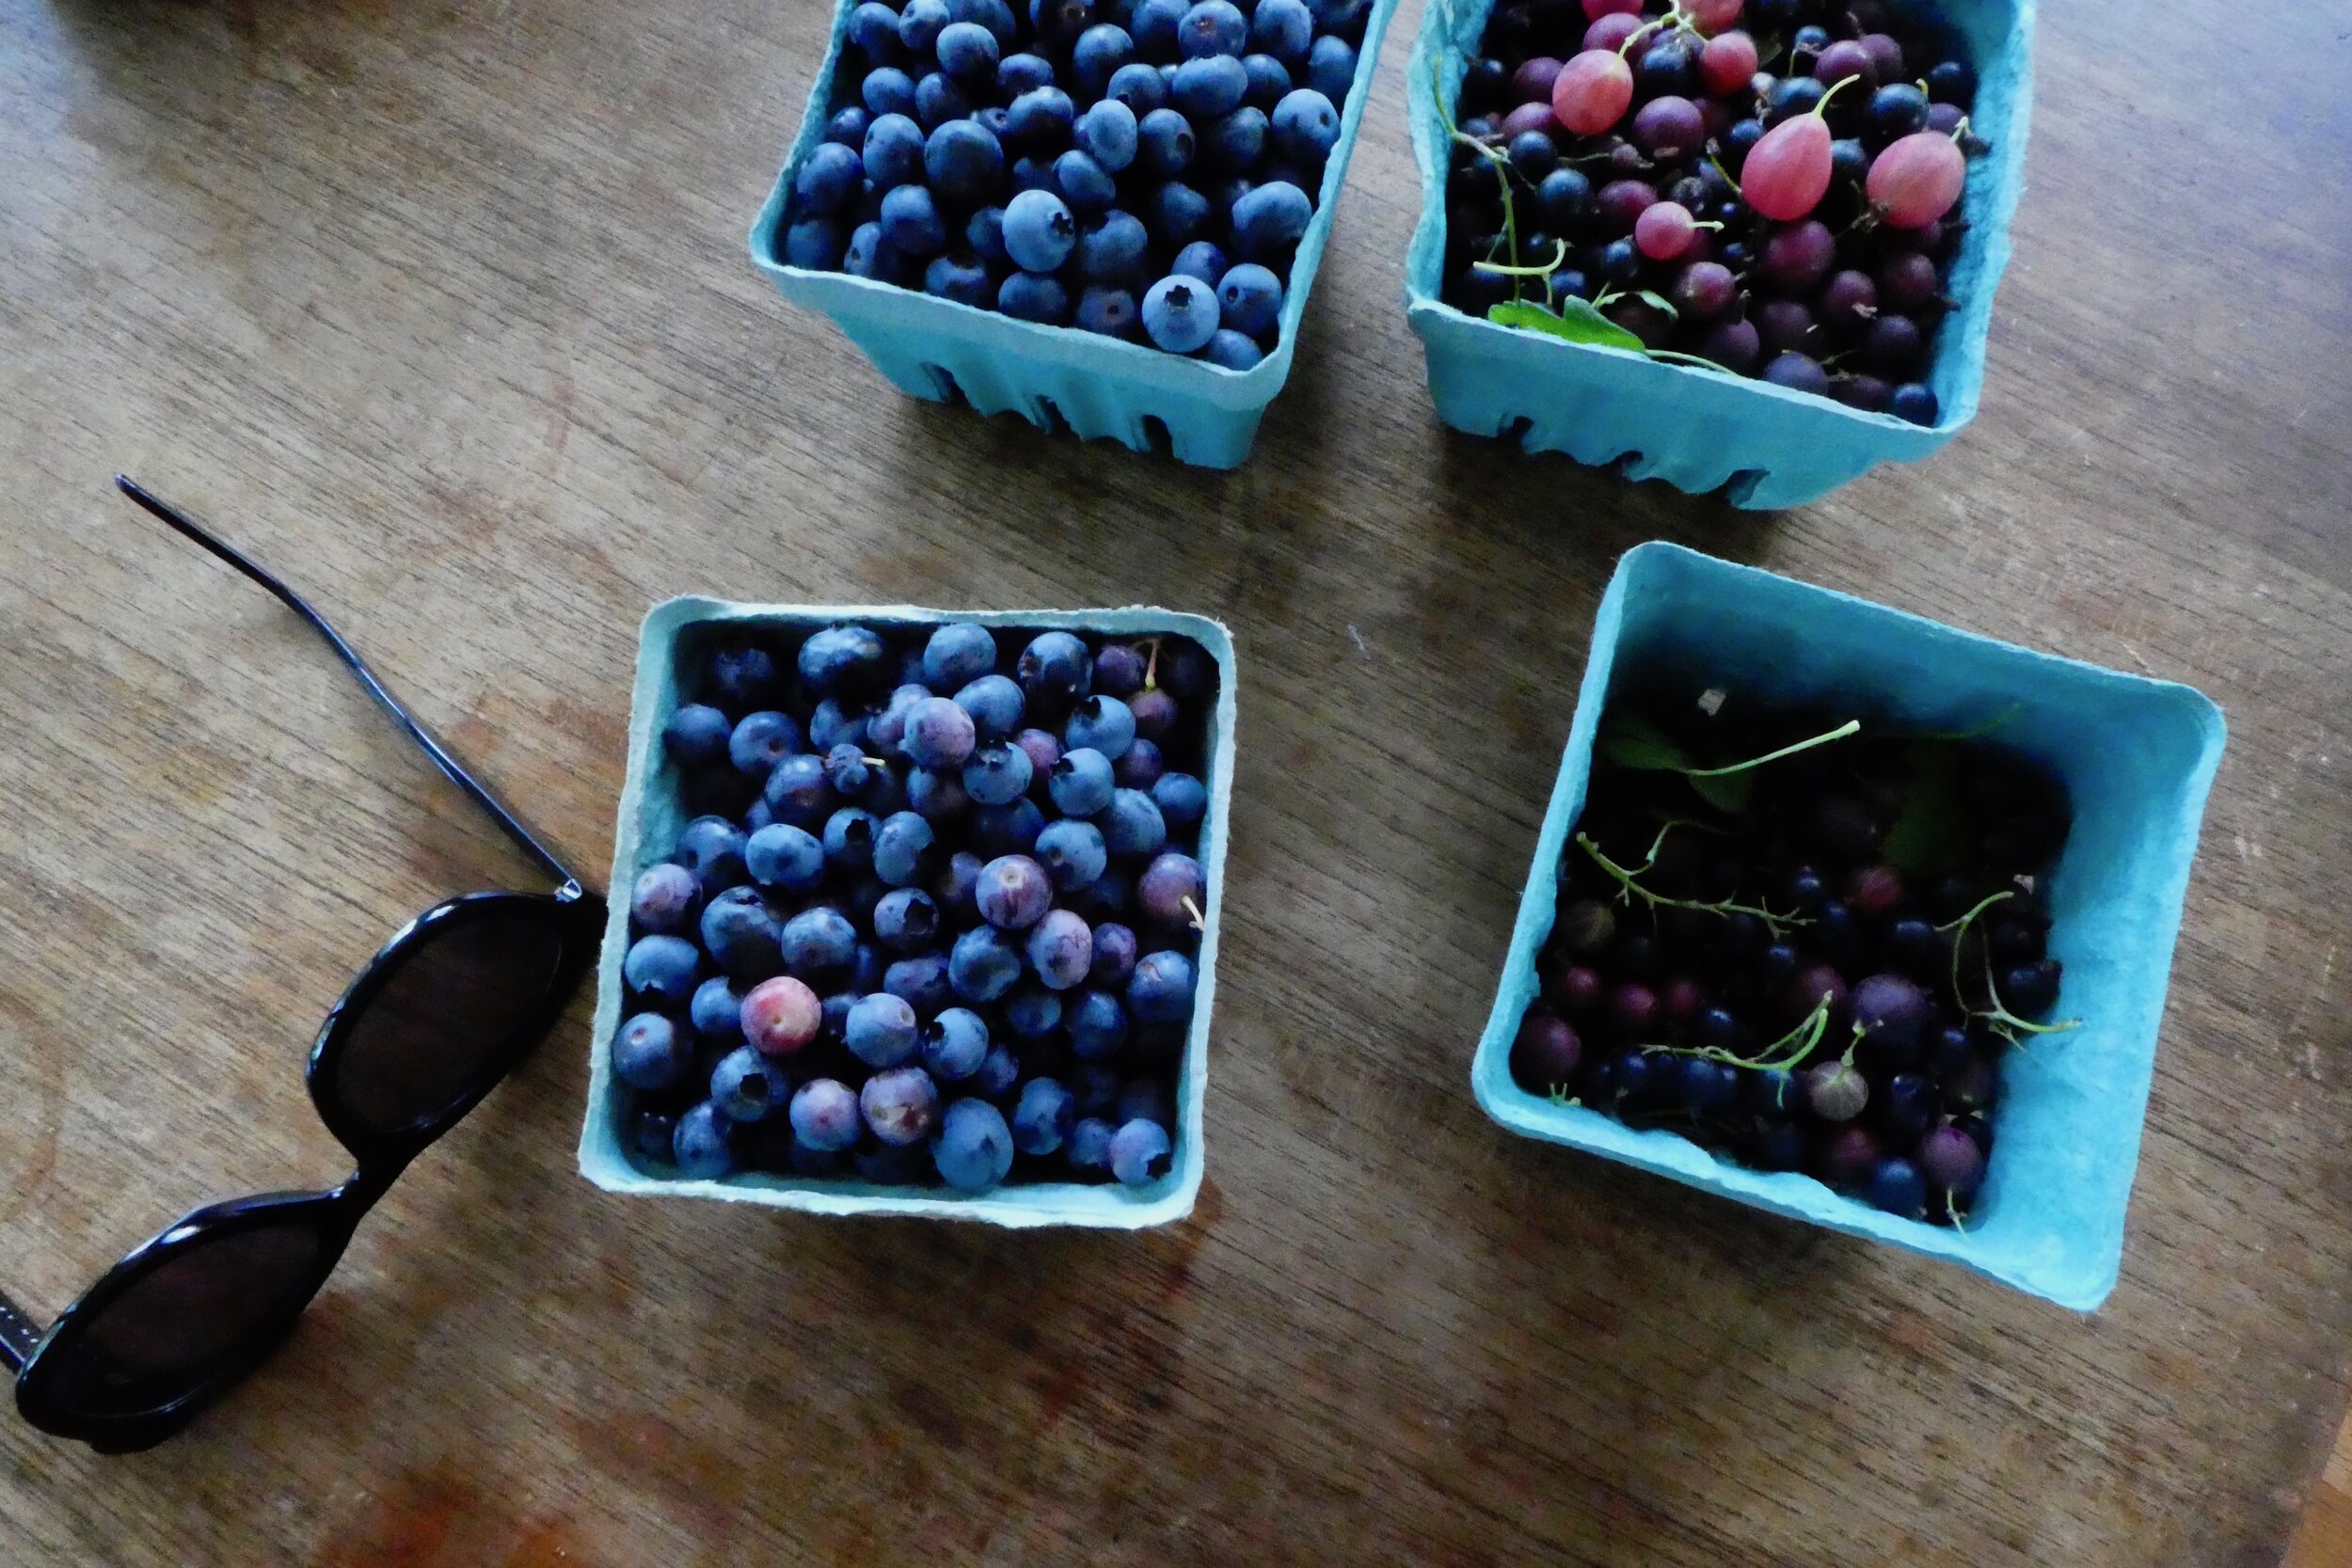
Thank you berry much

 
fig. a: out of the berry patch

fig. a: out of the berry patch

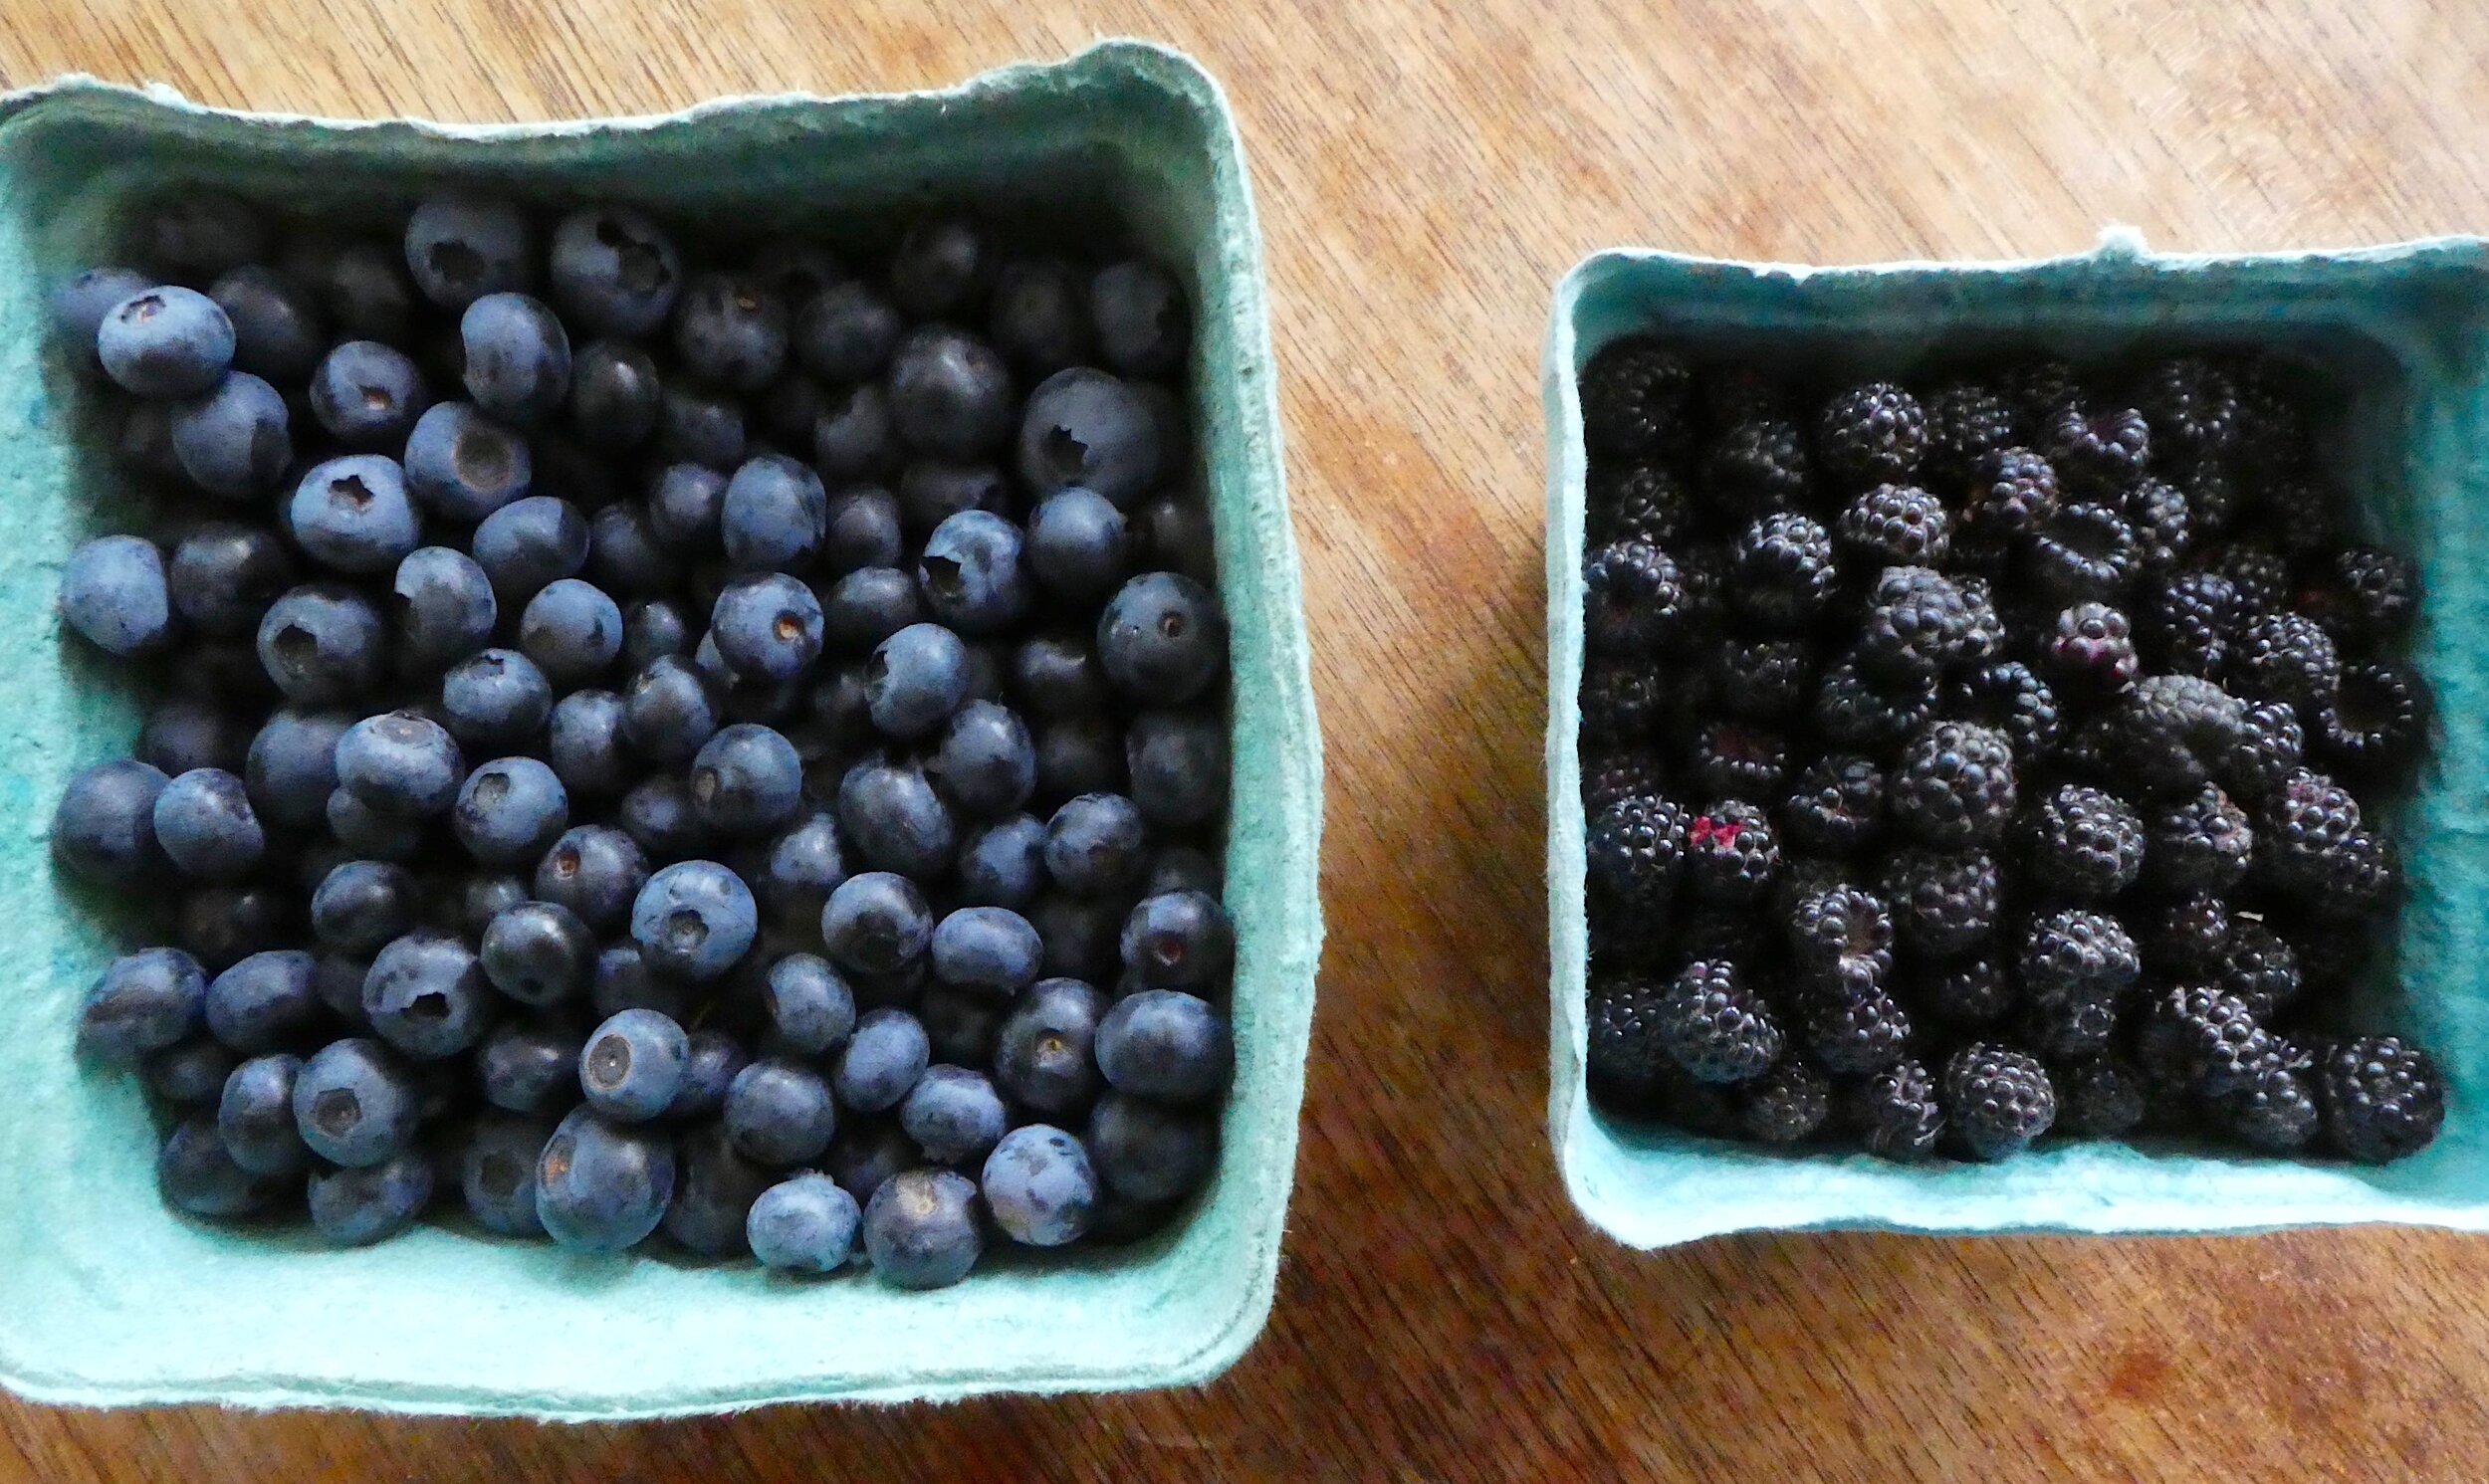
fig. b: bloobs & black raspberries

fig. b: bloobs & black raspberries

If you’re going to have an absolutely bonkers berry year—and we’re definitely experiencing one in our little neck of the woods right now—there are a few crucial recipes you need to go along with it.  And in my mind, one of them’s gotta be a proper pancake recipe.

Sure, you can fold berries directly into your batter to make, say, blueberry pancakes—you might even have a favourite blueberry pancake recipe on hand—but I’m talking about a “plain” (but definitely not plain) pancake recipe.  One that you can adorn with an unholy combination of butter, syrup, and freshly macerated berries as they come hot off the griddle.  One that will serve you well even when fresh, local berries have gone out of season.  One that’s truly heavenly.

fig. c:  out of “the grocery store”

fig. c: out of “the grocery store”

In this case, the recipe I have in mind is one that first appeared in Canal House Cooking no. 6 (“The Grocery Store”) way back in 2011.  But when Melissa Hamilton and Christopher Hirsheimer—the prodigious talents behind Canal House—compiled a year’s worth of their best recipes for their collection Canal House Cooks Everyday the following year, it’s not one that made the cut, strangely.  Hamilton & Hirsheimer were generous enough to share Hirsheimer’s family recipe for “Buttermilk Love Cakes” in their book—and that’s a blessing, there’s no doubt about it—but this recipe is similarly phenomenal, and it’s maybe just a tiny bit easier to get exceptional results with, because it’s maybe just a tiny bit easier to source good sour cream (which this recipe calls for) than it is to source good buttermilk (which the “love cakes” call for).  (Then again, maybe not—depends on where you live.)

fig. d: these gorgeous pancakes are a delicious part of a complete breakfast

fig. d: these gorgeous pancakes are a delicious part of a complete breakfast

Like virtually all of the very best pancakes, these sour cream pancakes are light as a feather and anything but banal.  These are pancakes that turn out beautifully, they’re supremely flavourful, and they marry wonderfully with the mixture of raspberries, blueberries, and black raspberries we’ve been enjoying in recent days.

fig. e:  the red & the blue

fig. e: the red & the blue

So without any further ado…

Canal House Cooking’s Sour Cream Pancakes

1 cup sour cream*

3 large eggs, separated

2 tablespoon melted butter

7 tablespoons cake flour

1 tablespoon sugar

1/2 teaspoon baking soda

1/2 teaspoon salt

Vegetable oil

Whisk the sour cream and egg yolks together in a medium mixing bowl.  Whisk in the melted butter.  Put the flour, sugar, baking soda, and salt into a sieve and sift into the sour cream mixture.  Lightly whisk until just mixed [a few lumps won’t hurt anything, according to Hamilton & Hirsheimer].

Put the egg whites into a clean mixing bowl and beat with a whisk until soft peaks form (this takes a bit of elbow grease, but it’s worth it). Use a rubber spatula to fold them into the batter.  Please, for the love of god, don’t overwork the batter.  Keep it light and fluffy.

Pour a little oil on a nonstick griddle or large skillet.  Wipe out the oil with a paper towel, leaving only the thinnest film.  Heat the griddle over medium or even medium-low heat [depends on your range] until hot.  Pour about 1/4 cup of batter on the griddle.  Cook until little holes appear on the surface and the cooked side of the pancake—go ahead and lift the edge to check!—is golden brown, about 1 minute on each side, if your griddle is at the proper temperature.  Slather on the butter, a few good glugs of real maple syrup, and and a heap of freshly macerated and/or fresh berries if you have them on hand.

Devour.

{Makes about sixteen 4-inch pancakes.}

[adapted ever so slightly from Melissa Hamilton & Christopher Hirsheimer’s Canal House Cooking, No. 6, 2011]

fig. f:  unholy mess

fig. f: unholy mess

Keep your berry mixture simple.

Mix together whatever fresh, ripe, local berries you have on hand (as long as they’re nice and sweet—like raspberries, blueberries, black raspberries, red currants, and blackberries**).  Depending on the amount of berries, stir in a tablespoon, or two (or three, or four…) of white sugar (the basic formula we use is about one tablespoon of sugar per cup of berries).  Crush the berries a little as you stir the sugar in evenly, bruising them so that they release their juices more readily.  Don’t overdo it with the sugar, but, if you’re going to sweeten them at all, don’t underdo it either.  This berry mix should be an absolute joy to eat and it should produce a fair bit of beautiful berry syrup, too.

If you prefer, do a mixture of macerated berries and entirely fresh berries, like the combination of macerated raspberries and fresh blueberries you see in the accompanying photographs.

And if you’re a purist, go ahead and top your pancakes with the simple pleasures of fresh, raw, unsweetened berries.  We won’t judge.

But, please, while berries are at their peak—as they are right now—insist on fresh, local berries if you can—preferably ones you harvested or foraged yourself.

aj

* We prefer Cabot Creamery sour cream whenever we can get our hands on it.

** Basically, you want to avoid things like gooseberries and blackcurrants, which are essentially inedible in their raw state (at least by humans).